Why Rototillers May be More Harmful than Helpful in an Organic Garden

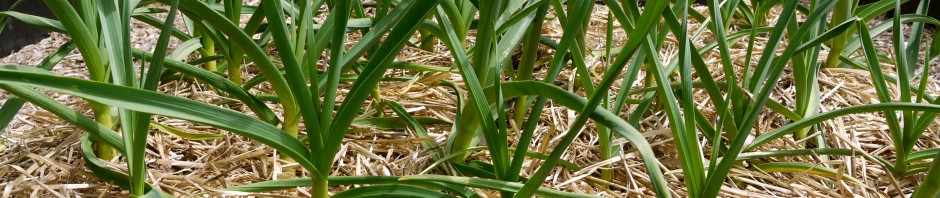
One of my "no-dig" garden beds.

The most important thing you can do, in my opinion, to grow a healthy, disease and pest-free garden is to build your soil. Therefore, the most important thing you can do to keep your garden pesticide and chemical fertilizer free is build your soil. And unfortunately, rototillers destroy soil rather than build it.

Soil is amazing and reflects the complexity of its Creator. It is so much more than weathered rock. Healthy soil also contains the decaying remains of dead plants and soil organisms, air, water and living organisms. It is these living organisms in particular that bring health to your soil and are destroyed by roto-tilling. It is said that a teaspoon of soil can contain billions of organisms! These organisms include fungi, bacteria, earthworms and anthropods. Listen to some of what these organisms do for your soil: they fix nitrogen from the atmosphere so that your plants can now use it, they aerate the soil, they break down toxins, suppress soil-borne diseases, and decompose organic matter. Some fungus even form symbiotic relationships with plant roots where each benefit from the other.

Ironically, we till to break up compacted soil, and in the end we compact it by tilling. Rototillers finely grind the soil killing the living organisms that are vital to soil health. Because the particles are so fine, aeration is diminished and soil structure is destroyed. The nutrient content of the soil is now compromised making  fertilization necessary. Plants will be less healthy making them more prone to disease and pests. You can see how this downward spiral would make growing a garden organically more difficult.

If you are clearing a large area for a new garden and find it necessary to use a rototiller, try to make this the one and only time. Hand digging is preferred; although it may disrupt the soil organisms, it does not destroy them. I prefer no dig methods of gardening such as lasagna gardening. This is a wonderful way to build a garden that builds soil, and eliminates the back breaking task of digging a garden.

A good resource is Healthy Soils for Sustainable Gardens, a Brooklyn Botanical Garden Guide edited by Niall Dunne. Also recommended is Lasagna Gardening by Patricia Lanza.

Shared at Sunday School, Homestead Barn Hop, Tuesday Garden Party, Teach Me Tuesday, Frugal Days Sustainable Ways, Rural Thursday, Simple Lives Thursday, Farmgirl Friday, Garden Club Thursday, Garden Life

Posted in Gardening - How to | Tagged , , , | 38 Comments

Sprouted Wheat Flour

Grass-fed burger on a beautiful sprouted wheat hamburger bun with pan-fried parsnips.

I first began to use sprouted wheat flour when I heard that it digests like a vegetable. Wow! But, the price is a bit steep, and digesting like a vegetable was not enough to motivate me to continue purchasing it. But, as I have learned more about grains, I have become committed to only using flour that has been sprouted, or otherwise properly prepared.

Grains contain phytic acid, and phytic acid blocks the absorption of several minerals in our bodies. In addition, grains contain enzyme inhibitors which prevent our own digestive enzymes from properly digesting the grain. Soaking, sprouting, or fermenting the grain breaks down and neutralizes much of the phytic acid and inactivates the enzyme inhibitors making the grain digestible.

Soaking whole wheat flour in an acid medium and liquid is one option for making the flour digestible. However, only freshly milled flour should be used since nutrients are very quickly lost and the germ becomes rancid after grinding.   Fermentation, or sourdough, is another option. Again, only freshly ground flour should be used. Wheat berries may be sprouted at home, dehydrated, and then ground into flour. At least for now, I prefer the convenience of purchasing sprouted wheat flour. When wheat is sprouted, the germ is consumed in the process and cannot become rancid. It is now a stable food able to maintain freshness and a shelf life of up to 6 months. Although purchasing sprouted wheat flour is the most expensive option, for me, it is one area where I choose convenience over price. I prefer Shiloh Farms brand; I’ve tried  one other brand that was less expensive, but my bread did not rise as nicely.

Here is the recipe I use for bread, taken from the Essential Eating blog:

Sprouted Flour Sandwich Bread
4 tablespoons room-temperature butter
4 tablespoons  maple syrup
1 1/2 cups room-temperature water
4 cups Shiloh Farms Organic Sprouted Flour (wheat or spelt)
1 1/2 teaspoons sea salt
2 teaspoons yeast

Place the wet ingredients in the bottom of a bread machine, and then add the dry ingredients, ending with the yeast. Use the basic cycle on your bread machine.

By the way, be sure to enjoy your homemade bread with butter. The vitamins A and D it contains help to absorb the minerals and B vitamins in the bread!

Sources of good information on properly preparing foods for best digestion are the books Nourishing Traditions and Essential Eating.

Shared at Sunday School, Monday Mania, Homestead Barn Hop, Fat Tuesday, Teach Me Tuesday, Real Food Wednesday, Rural Thursday, Simple Lives Thursday, Farmgirl Friday, Fight Back Friday

Posted in Food | Tagged , , , , , | 18 Comments

Rodale Institute

Rain water from the gutter runs down a chain and into a rain barrel.

J.I. Rodale is considered the father of the organic farming movement in the U.S. I’ve read Organic Gardening Magazine for many years and many Rodale Press books are included in my library. But I had never visited the Rodale Institute until recently, despite the fact that it is only an hour and a half away in Kutztown, PA. While there, Mike and I took a 2 hour workshop on growing apples organically. And we spent several hours roaming the apple orchards, fields, and gardens. Despite the fact that spring has not yet arrived, we found the farm to be interesting and inspiring.

All the "black gold" a girl could ever dream of!

For over 60 years, the Rodale Institute has been researching the best practices of organic agriculture. A thirty year “Farming Systems Trial” compared conventional, chemical agriculture with organic methods and found that organic farming yields match conventional methods. And in years of drought, organic farming outperforms conventional methods since organic methods build, rather than deplete the soil. This is encouraging news, as I often hear that “organic farming cannot feed the world”. I do not believe this to be true, and research is now supporting that. In addition, the trial showed that organic systems are more profitable than conventional systems!

This slideshow requires JavaScript.

Posted in Gardening - Inspiration, Photography, Places to Visit | Tagged , , , , | Leave a comment

Stone Barns Center for Food and Agriculture

As a Penn State Master Gardener, I am required to take 8 hours of continuing education each year.  I wanted to take the opportunity to visit a farm just outside of NYC called Stone Barns Center for Food and Agriculture, so I chose a day that a class that interested me was being held. I traveled with my husband, Mike, and my daughter, Jessi, on a cold, winter day through the beautiful Hudson River Valley and over the 3+ mile long Tappan Zee Bridge to the former Rockefeller estate.

We took the class Intensive Home Growing Techniques for Homegrown Edibles taught by James Carr of the NY Botanical Gardens and author of Gardening and Landscaping the Natural Way. The 3 hour class was informative and inspiring and I am especially anxious to begin using what I learned to extend the gardening season in my PA garden. I’ll try to keep you up to date in future posts.

Both before and after the class we enjoyed the 80 acre, four-season farm. We found much life for the middle of winter. Stone Barns raises over 200 varieties of organic crops in their fields and greenhouse beds. Many of those crops are growing right now, and not just in the greenhouses. It is also home to cows, pigs, chickens, sheep, ducks and turkeys – all pasture raised. The farm also maintains  a number of bee hives. One of the most exciting things we found are a cafe and a restaurant which are sourced from the surrounding fields and pasture, as well as other local farms. We enjoyed a fabulous lunch at the cafe which included parsnip soup, homemade bologna sandwiches on freshly baked bread (I could genuinely learn to like bologna if this is what it’s meant to be like), and parsnip cake with cream cheese icing (not surprisingly, they harvested parsnips this week).  The cake tasted very much like carrot cake and inspired me to consider growing parsnips.

Here are a few more shots from the day:

This slideshow requires JavaScript.

Shared at Simple Lives Thursday, Homestead Barn Hop, Fight Back Friday

Posted in Food, Gardening - Inspiration, Photography, Places to Visit | Tagged , , , , , | 6 Comments

Cooking Moist and Tender Pastured Poultry

Pastured Chicken in Brine

 Nutritionally, a pastured chicken is far superior to traditionally raised chicken. Chickens that are running around on pasture eating insects, worms, and forage have a great taste, but they also have muscle tone. And chickens with muscle tone are not tender. With a lot of trial and error, I have learned the secret to cooking a tender chicken. The answer is simple. Brining the chicken results in moist and tender meat. There are numerous scientific explanations available on the internet as to why this works. Whatever. I’m interested in how. To every gallon of water, I stir in 1 cup of kosher salt and 1/2 cup of sugar. You may use sea salt, but it’s pricey. And I use organic sugar. I find that a gallon of water is generally just enough to cover an average size chicken. Sometimes I add onion or bay leaves to the water. Sometimes I don’t. I don’t find that it makes a huge difference. I add the chicken to the brine and refrigerate for up to 24 hours. I then remove the chicken and pat it dry. I season according to the recipe I am using but I omit the salt in the recipe.

Before I learned this secret I was slow cooking the bird in order to tenderize it. Every meal tasted like chicken soup. I like chicken soup. When I’m eating chicken soup. But not every time I eat chicken. I find that I can now cook chicken a variety of ways with success. For roasting, it is generally best to cover your roasting pan. The dark meat lends itself beautifully to braising and the boneless breasts are wonderful for stir fry. Or I may cut the chicken into pieces and grill it or roast it covered in homemade barbecue sauce.

Let me know if you try this method and what you think. And if you have any tips, let me know. I’m always open to new ways of cooking pastured poultry.

Update: A reader, Diana, commented and provided some extremely helpful information that is worth adding directly to this post:

We raise free-range, pastured poultry, and yes, they have more muscle tone. BUT they are still extremely tender. Not tough at all. One thing most people don’t know is that the chicken needs to “rest” in cold, but not freezing conditions, for 1-2 days before freezing. Many processors boast that their birds get frozen immediately after processing, and customers get the impression that this is a safer, better product. All it does is make for a tough bird that needs brining. The chemicals responsible for rigormortis have to break down a little before being frozen. That said, we usually roast ours whole. No brining, just some olive oil or butter, herbs, usually some lemon. Trick is to start with a HOT oven, (425) for 15-20 minutes, then push it down to 350 for the remaining 45 minutes. Thermometer in breast has to read 165, at least. THEN, let bird rest again for 10 minutes before carving, to keep more of the juice inside the meat.

Shared at: Simple Lives Thursday, Pennywise Platter ThursdayFight Back Friday, Sunday School, Monday Mania, Weekend Gourmet, Fat Tuesday, Real Food Wednesday

Posted in Food | Tagged , , , , , | 15 Comments

Glass Etching

Etched Glass Juice Glasses Cut From Bottles

I enjoy taking something that no longer has use and making it into “something else”. Old glass bottles, a little acid etching cream, and that “something else” can end up attractive. Here’s how I do it:

Cut a design out of clear contact paper. In this case, I traced a fern and cut it out.

I placed the contact paper on a glass jar that had contained sea salt.

I covered the entire jar in Armour Etching Cream, available at any craft supply store. In the case of the green juice glasses at the top of this post, I did the reverse. The fern design is etched. With the clear bottle above, all but the fern design is etched.

After 5 or minutes, I washed off the etching cream. (A friend saves the cream to re-use. I tried that and just ended up with a mess). I added a pump to complete my soap dispenser.

Here is a wine bottle I use to water plants.

Have you tried etching glass? What projects have you completed?

Shared at Making Your Home Sing

Posted in Don't Throw it Away, Upcycle | Tagged , , , , | 14 Comments

Those Annoying Stickers on Fruit Contain Useful Info

Are you as annoyed as I am at those stickers you have to peel off of fruit and some vegetables you purchase at the grocery store?  One more reason to shop at farmer’s markets or grow your own.  But, here in NEPA, the climate demands bringing in anything not in season.  (Maybe I should be re-thinking that concept). But, those stickers do contain one bit of information that is quite useful.  Each sticker contains a number – either 4 or 5 digits.  Four digits indicate that the fruit was conventionally grown.  If there are 5 digits and the first is a 9, the fruit has been grown organically; if the first is an 8, that fruit is genetically modified. Good to know, aina’?

This post was shared at Weekend GourmetMonday ManiaFat Tuesday, Real Food Wednesdays, and Simple Lives Thursday.

Posted in Food | Tagged , , , | 12 Comments

Sour Mulch: I Learned This One the Hard Way

We had an old concolor fir on our property that was struggling from the day we bought this place. We tried for 8 years to save that tree. This year, we finally resolved ourselves to the fact that it had to be cut down for our, and our neighbors, safety. Our arborist (yes, he’s ours) cut the tree, and at our request, left the chipped wood in a pile for us to use as mulch. This sat for most of the summer.

We lost a lot of privacy when the tree was cut, but we decided to plant azalea and rhododendron rather than another tree. We purchased and planted three each this past May. The spring and early summer were rainy, so we waited to mulch. July was dry, so we watered faithfully, and around the middle of the month applied mulch from the pile that sat in our yard, to conserve moisture. Each of the plants, up to this point, were thriving and showing new growth. August was rainy, and one of the rhododendron wilted. A week later, a second one did the same. I used a water meter to be sure they were getting enough water. With the amount of rain we were getting, I don’t know how they couldn’t, but I wanted to be sure. I felt certain that the problem was too much rain, and that a fungal disease had attacked their roots. I cut a branch of wilted leaves and took it to the nursery where we had purchased the plants. I was assured that the plants did not have root rot, or any other disease. The gentleman felt certain that I was not watering the plants enough. I felt certain that I was. It continued to rain, I continued to monitor the moisture, and the two plants continued to fail. What really confused me were the four other plants that were growing and thriving.

Friends of ours purchased their first home recently. The property has a number of trees that are showing signs of stress. The previous owner had mulched the trees improperly and this was certainly the cause of the problem. They asked me for advice; I did a bit of research because I knew that to just remove the old mulch may expose adventitious roots that would have grown up into the much too deep mulch.  And aha! I found the problem that caused my two rhododendron to die.

Our pile of mulch was large, and was not being turned. This caused the microbial activity within the pile to shift from an aerobic to an anaerobic (low oxygen environ­ment) condition. Anaerobic fermentation can cause waste products such as acetic acid, methanol, ammonia gas and hydrogen sulfide to accumu­late and cause direct plant injury. And newly planted shrubs tend to be the most sensitive to this problem. The symptoms resemble drought stress, which is why the gentleman at the nursery was sure I was under-watering. And the symptoms began shortly after mulching. Most of the plants were mulched from the outside of the pile, where oxygen was present. But I remember digging deeper into the pile at times, and it is apparent that the two troubled rhododendron received this mulch.

Sour mulch is easily identified by the presence of a pungent odor similar to vinegar, rotten eggs or ammo­nia, and should not be used. It is not necessary to dispose of the mulch. It just needs to be spread out for a few days giving the gases a chance to disperse, and then can be safely used.

Posted in Gardening - How to | Tagged , , , , , , , , | 5 Comments

Kruschiki: the Ultimate Christmas Cookie

My friend Cristina and my daughter Jessi with the finished cookies.

Crisp. Rich. Not too sweet. They have more than a taste. They have a feel that I couldn’t begin to describe. And they are beautiful. THIS is the cookie of my childhood. A special part of my Polish heritage. We made them every year. And I yearn for a life where time for such things exists. Making Kruschiki takes hours. It’s been 2 years since I’ve made them, and it was probably 15 years before that.

My friend Cristina loves to hear people’s stories. She wants to know who you are, where you came from, what makes you tick. She wants to know your heritage, your traditions, your food. She is why I made Kruschiki 2 years ago. I don’t know when I’ll make them again, but today I can’t stop thinking about them, and so I can at least tell you about them.

The bow tie shapes of dough

Cristina cutting the dough

Frying the dough

Without the powdered sugar

The finished masterpiece

How to Make Kruschiki

Ingredients: 2 eggs, plus 4 egg yokes, at room temperature, 1/2 t. salt, 2 c. flour, 1/2 c. powdered sugar, 1/4 c. softened butter, 1 shot of brandy, oil for frying.

Directions: Beat eggs, egg yolks, salt and butter until thick and lemon colored. Slowly beat in the powdered sugar and brandy. Slowly mix in flour. Knead the dough for 3 – 5 minutes. The dough should be thick and will be a bit sticky. To roll, you will be working with small balls of dough. Keep the rest of the dough in the bowl, covered with a clean, damp dishtowel. On a floured surface, use a rolling pin to roll the dough out very thin – 1/8th of an inch. Take a sharp knife and cut the dough into strips about 2″ wide. Then cut the other way on a diagonal to make pieces of dough that are about 2″ x 4″. Cut a small slit (1″ or less) in the center of each piece. To form the cookie, take one end and place it through the slit. Very gently pull the end of the dough through the slit to form a bow shaped cookie. In a large pot or deep skillet heat about 3 – 4 inches of oil until very hot. Test the oil by putting in a small scrap of dough; it should sink to the bottom and then immediately float to the top. When this happens your oil is ready. Fry the cookies in small batches. Fry for about 30 seconds and then use tongs to gently turn the cookies over. The cookies should be barely golden brown. Drain on paper towels. Cool. Dust liberally with powdered sugar. Makes about 6 dozen cookies.

Posted in Christmas, Food, Photography | Tagged , , , , | 19 Comments

Ornaments From the Garden – Santa Okra

A number of years ago, I had purchased some okra, dried it, and painted santa faces on it. But, it was a bit of a disappointment. I purchased the largest fresh okra I could find, but after drying it, I ended up with a lot of tiny Santas. This past summer I grew okra for the first time. I harvested them before they got large and tough, but a few of them got away from me and were inedible. So I thought I would try the Santa ornaments again. This time they were a success! A few of the Santas are 10″ long.

Okra in the garden

Drying the Okra

Santa Okra

Santa

Posted in Christmas, Gardening - Inspiration | Tagged , , , | 16 Comments